15 Practical Fireplace Makeover Ideas to Transform Your Living Room
Many living rooms have a focal point that just doesn't fit the home's style: the fireplace. It might be dated, a difficult color, or simply bland. The good news is that updating this one feature can dramatically elevate your entire space. You don't always need a complete demolition or a massive budget. By focusing on high-impact areas like the surround, the mantel, or the finish, you can achieve a polished, "finished" look. This guide provides 15 practical ideas, ranging from simple weekend updates to more involved renovations, to help you turn that overlooked fireplace into your favorite part of the room.
LIVING ROOM
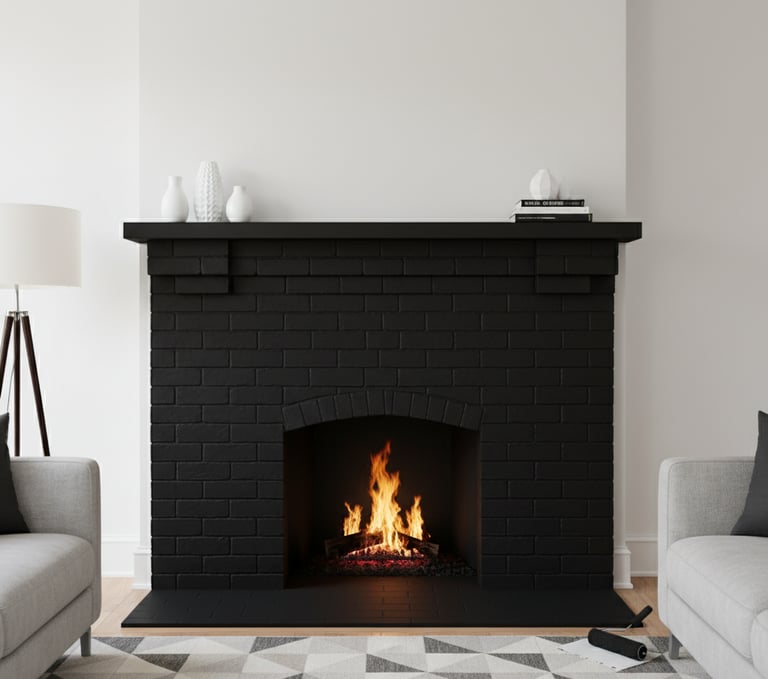
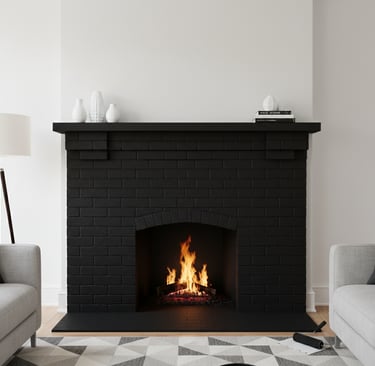
1. Modernize with a Fresh Coat of Paint
Let's start with the simplest, most effective change. A coat of paint can instantly neutralize a clashing brick or dated tile surround. For a dramatic, modern look, consider a dark, matte color like charcoal or black, as it can hide imperfections and make the firebox pop. This is especially effective on dominant red brick fireplaces.
Tip: Always clean the surface thoroughly with a strong degreaser like TSP (trisodium phosphate) to remove any soot or residue. Then, use a high-adhesion or masonry-specific primer before applying two topcoats. Use a microfiber roller (e.g., 1/2" or 12mm) to get paint into the texture of the brick.
Difficulty: Beginner
Cost: $100 - $150
Time: 1-2 days (including drying)
Categories
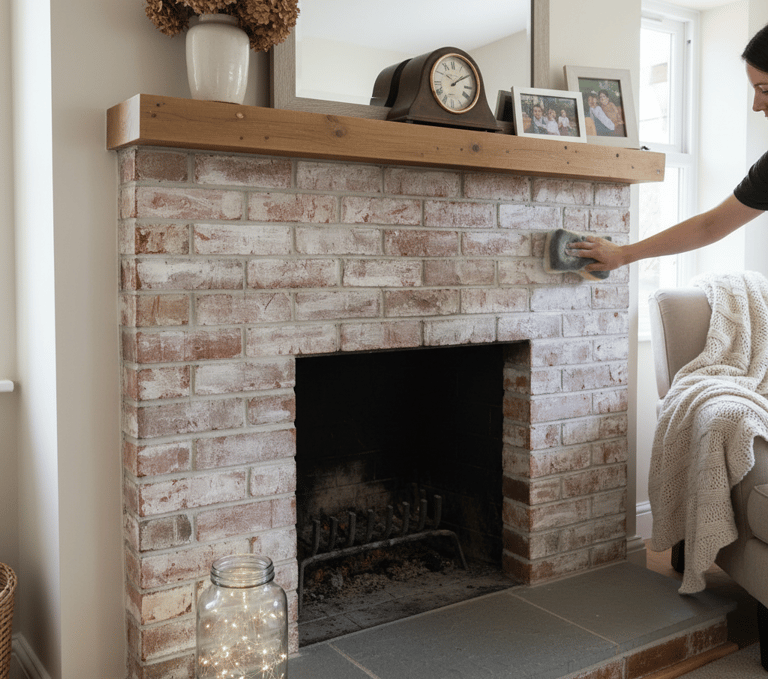
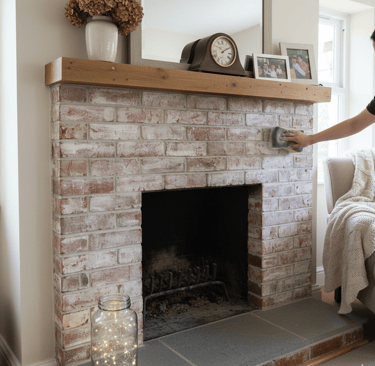
2. Apply a Whitewash for a Softer Look
If solid paint feels too heavy, whitewashing is an excellent alternative. This technique brightens the brick while allowing its natural texture to show through, perfect for a rustic, farmhouse, or coastal aesthetic. Create a simple solution by mixing one part white matte latex paint with three parts water.
Tip: Apply the mixture with a sponge or cloth, then wipe it off quickly with a clean, damp rag. The more you wipe, the more brick will show through.
Warning: Work in small sections. Don't let the mixture dry before wiping, or you'll get a chalky, uneven finish instead of a translucent stain.
Difficulty: Beginner
Cost: Under $50
Time: 3-4 hours
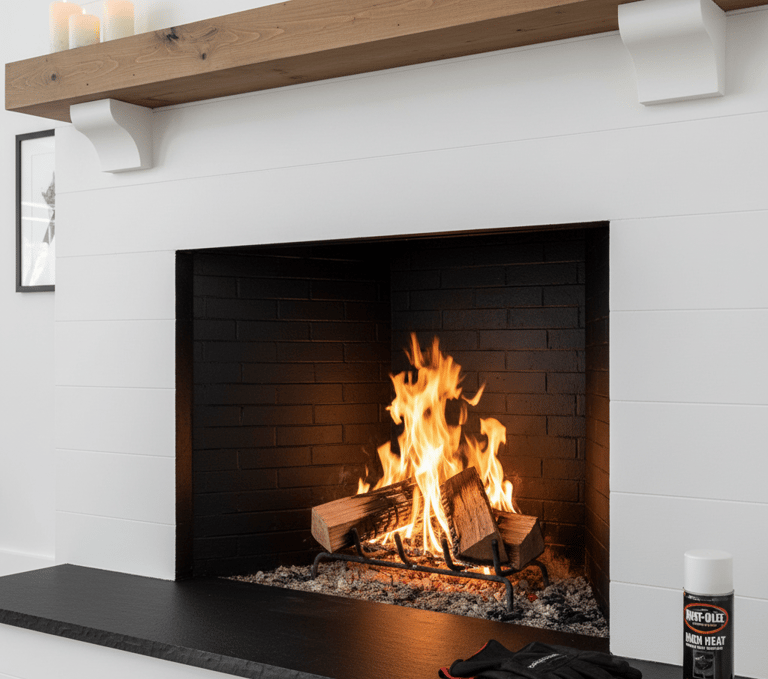
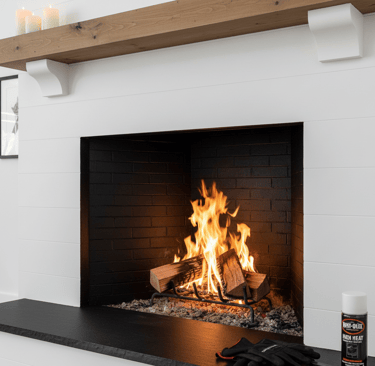
3. Paint the Firebox Interior
Don't overlook the inside of the firebox. Most are stained with soot or a dull grey. Applying a coat of high-heat-resistant matte black spray paint is a 30-minute job that makes a huge difference. It creates a clean, dark backdrop that makes the flames appear brighter and more vibrant.
Tip: Clean the interior with a wire brush to remove all soot and debris first. Allow the paint to cure fully as per the manufacturer's instructions (usually 24-48 hours) before lighting a fire.
Difficulty: Beginner
Cost: $20 - $30
Time: 1 hour (plus curing time)
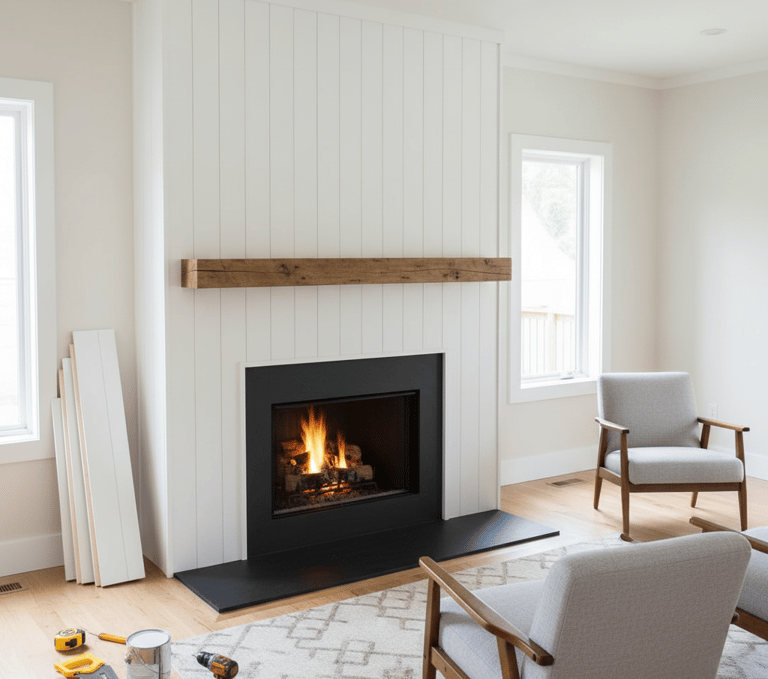
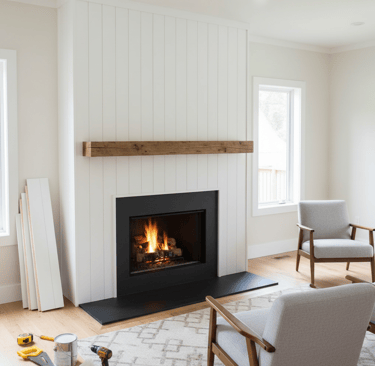
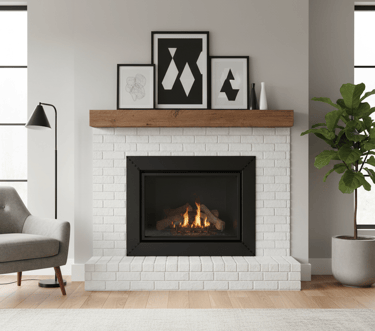
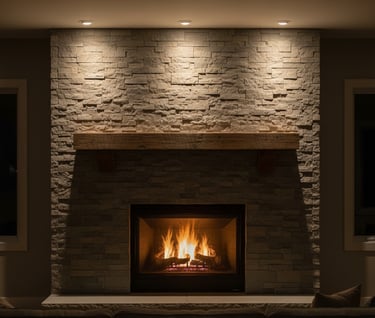
4. Add Architectural Definition with Paneling
If your fireplace is just a box on a flat wall, it may lack architectural presence. Building a new "surround" using shiplap (for a horizontal, coastal feel) or board-and-batten (for a classic, vertical lift) can add instant character. This involves creating a frame around the firebox that extends up to the ceiling or mantel.
Tip: Always pre-drill your nail holes to prevent the wood from splitting. Fill all holes and seams with wood putty and sand smooth before painting for a professional, seamless finish.
Difficulty: Intermediate
Cost: $200 - $250
Time: 1-2 days
9. Add an Industrial Steel Frame
To achieve a sharp, industrial, or modern farmhouse look, frame the firebox opening with black steel. This involves cutting angle iron to size, welding the corners, and painting it with a high-heat black spray paint. The metal frame is then mounted to the masonry, creating a bold, graphic contrast against a white or brick surround.
Warning: This project requires metalworking and welding skills, making it an advanced DIY. Alternatively, you can have a local metal fabricator create the frame for you to install.
Difficulty: Advanced
Cost: $220 - $270
Time: 1 day
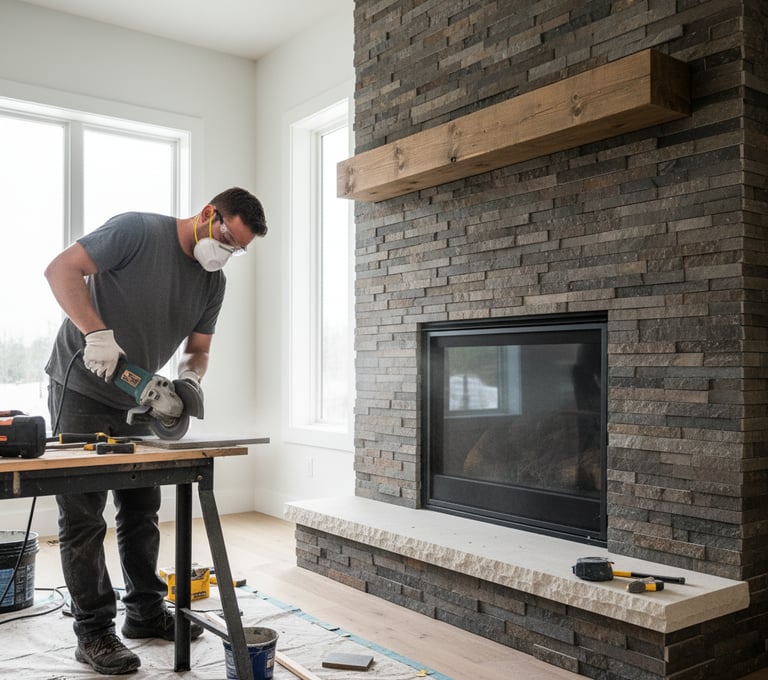
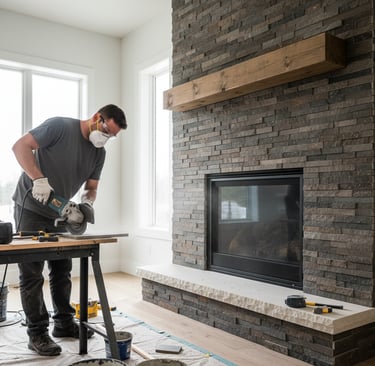
6. Apply Stone Veneer for Timeless Texture
For a high-end, timeless transformation, replace dated tile with stone veneer. Unlike full stones, veneer is a thin, lightweight layer of real stone (like stack stone or limestone) that is applied to the wall like tile. This adds incredible texture and a sense of permanence. The process involves dry-fitting the panels, cutting pieces, and adhering them to the wall with a strong mortar or tile adhesive.
Tip: You will need to rent an angle grinder with a diamond blade or a wet saw for cutting.
Warning: Always wear a high-quality mask (N95) and eye protection when cutting stone or concrete-based products, as the dust can be harmful.
Difficulty: Intermediate to Advanced
Cost: $600 - $900 (for a standard surround)
Time: 2-3 days
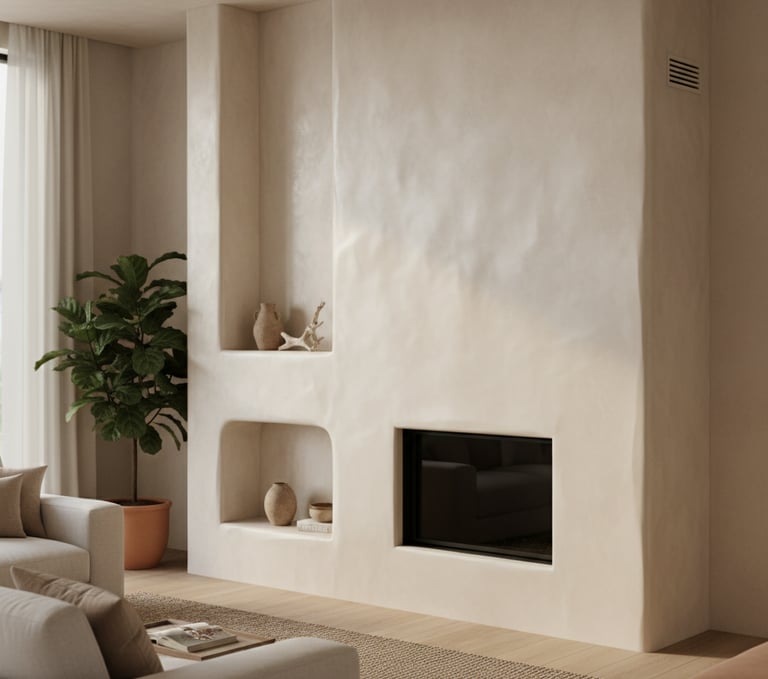
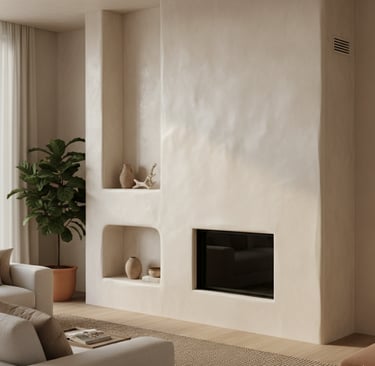
7. Create a Smooth Stucco or Plaster Finish
For a minimalist, Mediterranean, or modern organic feel, consider covering your entire fireplace surround with plaster or stucco. Using a product like Venetian plaster, you apply thin layers with a steel trowel. The final layer is "burnished" (pressed firmly with the trowel as it dries) to create a smooth, subtle sheen that looks and feels like polished stone.
Tip: This is an art form. Practice your trowel technique on a spare piece of drywall first to get a feel for the circular motions and pressure needed.
Difficulty: Intermediate
Cost: $150 - $200
Time: 2-3 days (due to drying between coats)
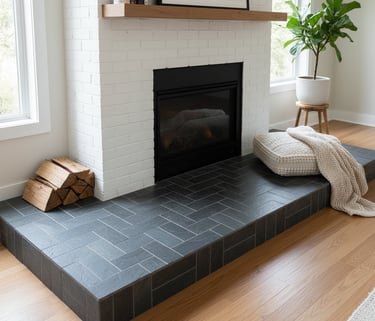
8. Redefine the Space with a Hearth Extension
An undersized hearth can make a fireplace look small and unfinished. Extending the hearth (the floor-level area) grounds the entire feature. Large-format slate, granite, or porcelain tiles are perfect for this. Laying them in a classic herringbone or stacked pattern can add subtle design interest and create a more intentional, functional "zone."
Tip: You will likely need to rent a wet saw for clean, precise cuts on hard materials like slate or porcelain.
Difficulty: Intermediate
Cost: $200 - $325
Time: 2 days
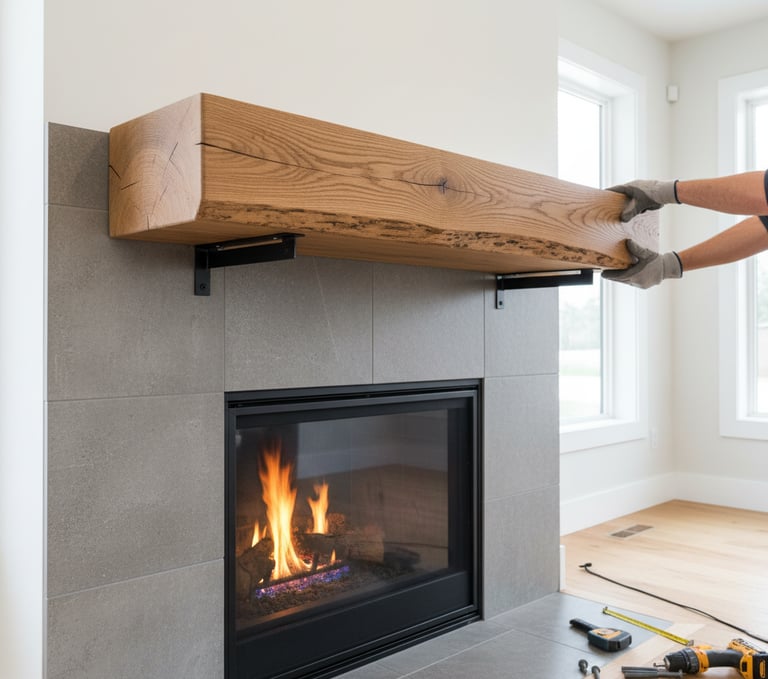
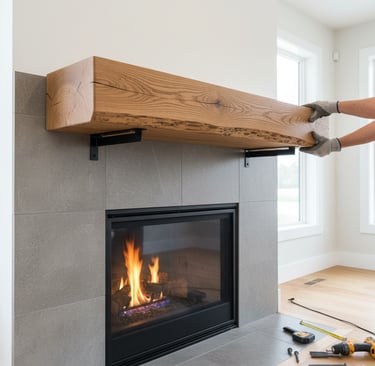
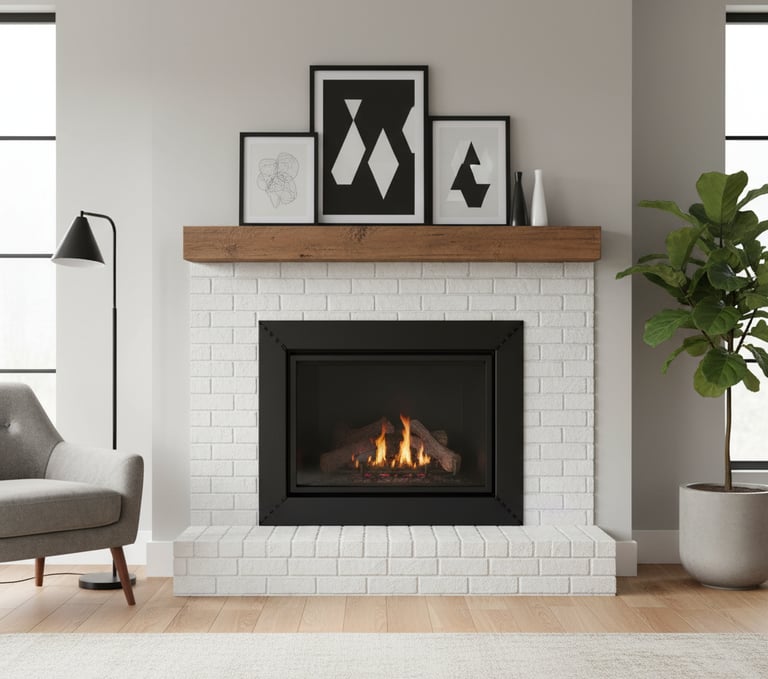
5. Install a Modern Floating Mantel
Remove a dated, ornate mantel and replace it with a sleek, floating version. A thick beam of reclaimed wood or a clean-lined box mantel adds modern or rustic charm. The "floating" look is achieved by using heavy-duty steel brackets that are anchored directly into the wall studs with lag bolts. The mantel then slides over or rests on these hidden supports.
Tip: For heavy mantels, locating wall studs is non-negotiable. If studs aren't available on a masonry wall, use specialized chemical anchors, but anchoring to studs in a drywall-framed wall is the safest option.
Difficulty: Intermediate
Cost: $350 - $550 (highly dependent on wood choice)
Time: Half a day
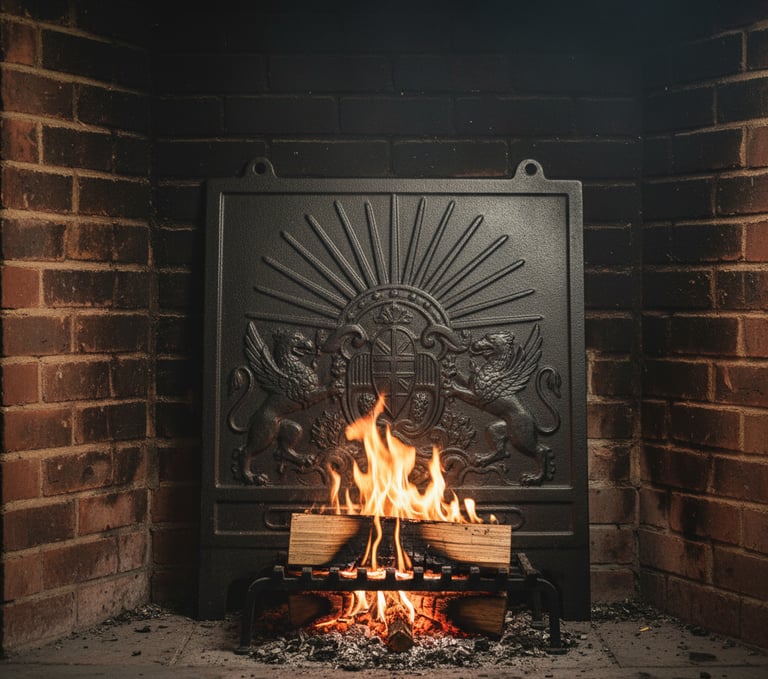
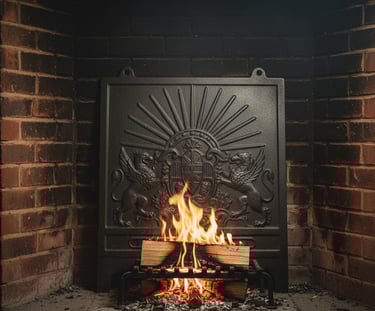
12. Add a Cast Iron Fireback
For an incredibly simple, fast, and non-permanent update, add a cast iron fireback. This is a heavy, decorative iron plate that simply leans against the back wall of your firebox. It has two benefits: it protects the back masonry and, more importantly, it absorbs heat and radiates it back out into the room. You can find beautiful antique or reproduction firebacks online.
Difficulty: Beginner
Cost: $180+
Time: 10 minutes
13. Install Ambient Lighting
Many fireplaces feel dark and heavy in the evenings. Installing dedicated lighting can highlight the new texture or mantel. Consider installing two or three small recessed LED downlights (warm white, 3000K) in the ceiling about 24 inches (60cm) out from the wall. Angled correctly, they will "wash" the fireplace in a soft, ambient glow.
Warning: Unless you are a qualified electrician, it is highly recommended to hire a professional for any work that involves running new wires.
Difficulty: Intermediate (or hire a pro)
Cost: $200 - $250 (if hiring an electrician)
Time: 4-6 hours
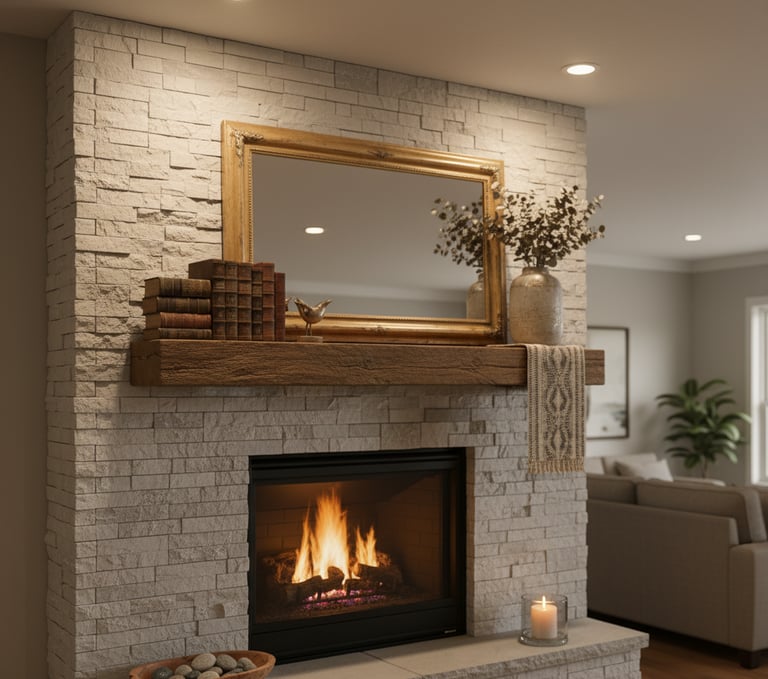
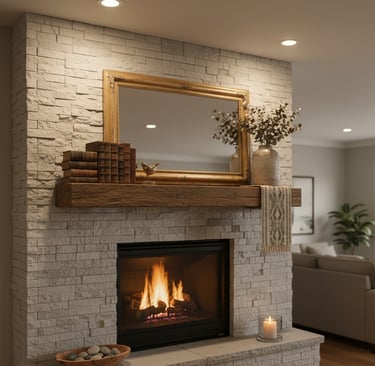
14. Restyle the Mantel with Layers
Sometimes the "makeover" is just in the styling. Clear off the clutter and rebuild your mantel display with intentional layers. Start with a large base item (like a mirror or art), add a middle layer of varying heights (books, a vase with branches), and a front layer (a small bowl, a candle). Mix textures: wood, metal, ceramic, and textiles.
Tip: Keep the tallest items to the sides or center, and allow for "breathing room" so it doesn't look cluttered.
Difficulty: Beginner
Cost: Free (if using existing items)
Time: 1 hour
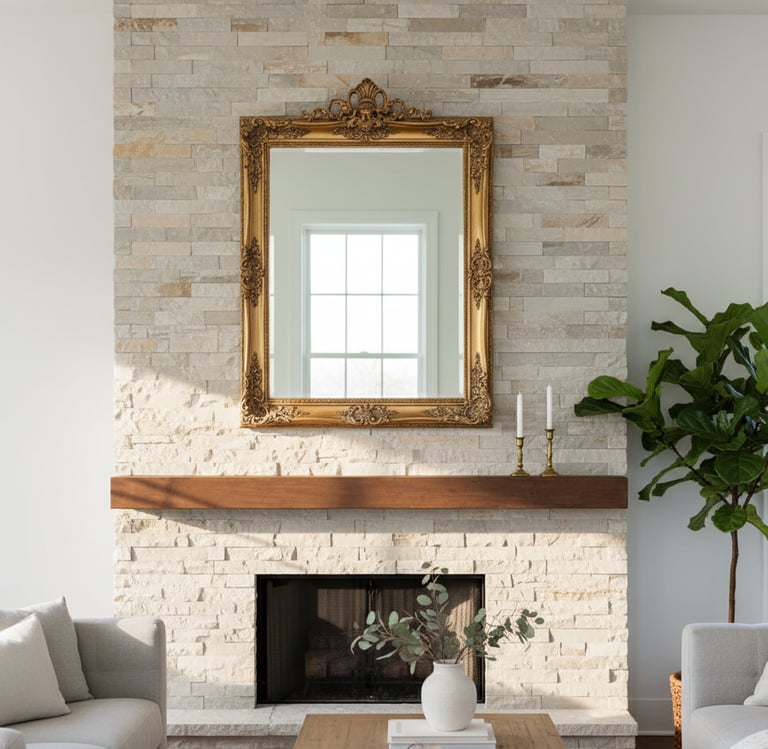
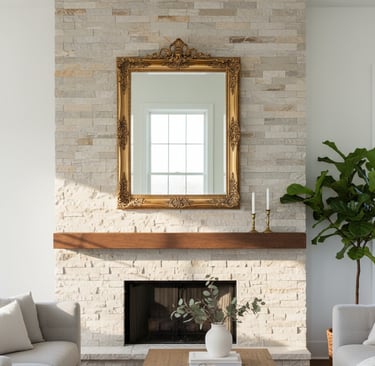
15. Hang a Large Mirror
If your mantel doesn't already have a large focal point, consider a mirror. Hanging a large, beautifully framed mirror above the mantel is a classic designer trick. It dramatically increases the light in the room (especially in north-facing spaces) by reflecting windows and light sources. It also makes the entire room feel larger and more open.
Tip: Securely hang heavy mirrors using two D-rings and picture wire, or use wall anchors rated for at least double the mirror's weight.
Difficulty: Beginner
Cost: $100 - $200
Time: 30 minutes
Frequently Asked Questions
1. Is it really okay to paint a marble fireplace? Yes, but it requires careful preparation. You must scuff-sand the glossy surface first to give the primer "tooth" to grip. Then, use a high-adhesion "bonding" primer. After the primer is fully cured, you can topcoat with durable enamel paint for a lasting finish.
2. How hard is it to install a stone veneer? This is an intermediate to advanced DIY project. The challenge isn't the sticking, it's the cutting. You'll need an angle grinder or wet saw and must be precise. For a standard surround, materials can cost between $600 and $900.
3. What's the safest way to hang a heavy floating mantel? The only safe way to hang a heavy beam is to anchor the support brackets directly into wall studs (in a framed wall) or into solid masonry (brick/block) using specialized chemical anchors. Never rely on drywall anchors alone.
4. What’s the easiest, quickest update I can do? Painting the firebox interior black (under 2 hours) or applying a whitewash to brick (under 4 hours). Both are very low-cost and high-impact. Adding a cast iron fireback is the fastest, taking only 10 minutes.
5. How do I stop my newly painted surround from getting dirty with soot? First, ensure your chimney is cleaned annually. Second, burn only dry, seasoned hardwood, which produces far less soot. Finally, using a wood-burning insert (as mentioned in point 11) or a simple glass screen will contain almost all soot and smoke.
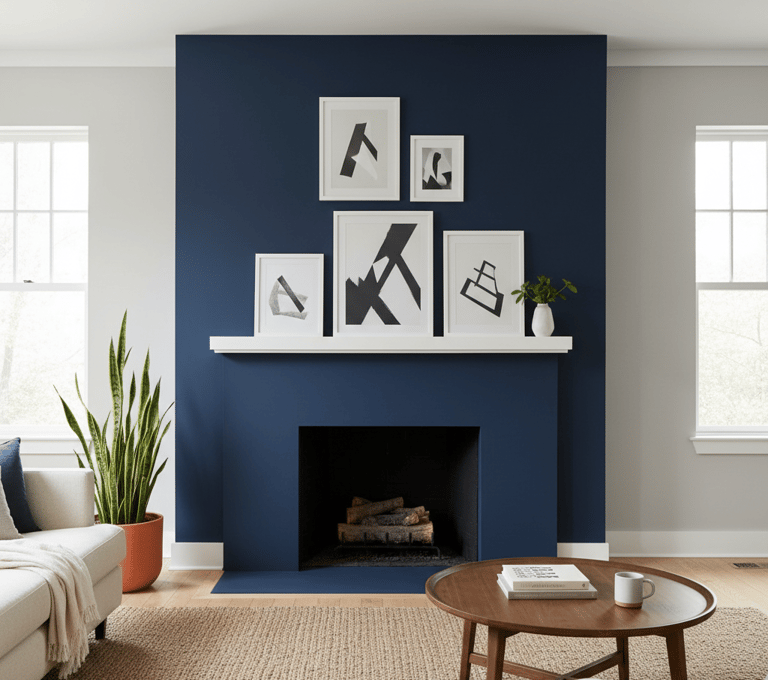
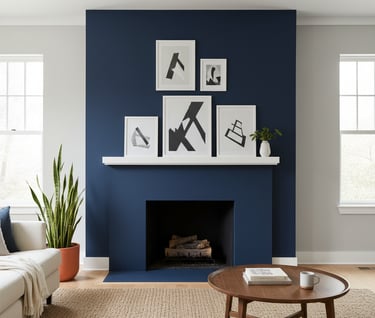
10. Go Bold with a Saturated Color
While white, black, and grey are safe, don't be afraid of color. Painting your fireplace surround (especially a wood or plaster one) in a deep, bold hue—like a moody green, a deep navy, or a warm, earthy brown—can turn it into a true statement piece. It’s a fantastic way to anchor the room.
Tip: Use a durable eggshell or satin finish for wipeability. Invest in high-quality painter's tape to get perfectly crisp lines between the surround and the wall.
Difficulty: Beginner
Cost: $100 - $120
Time: 1-2 days
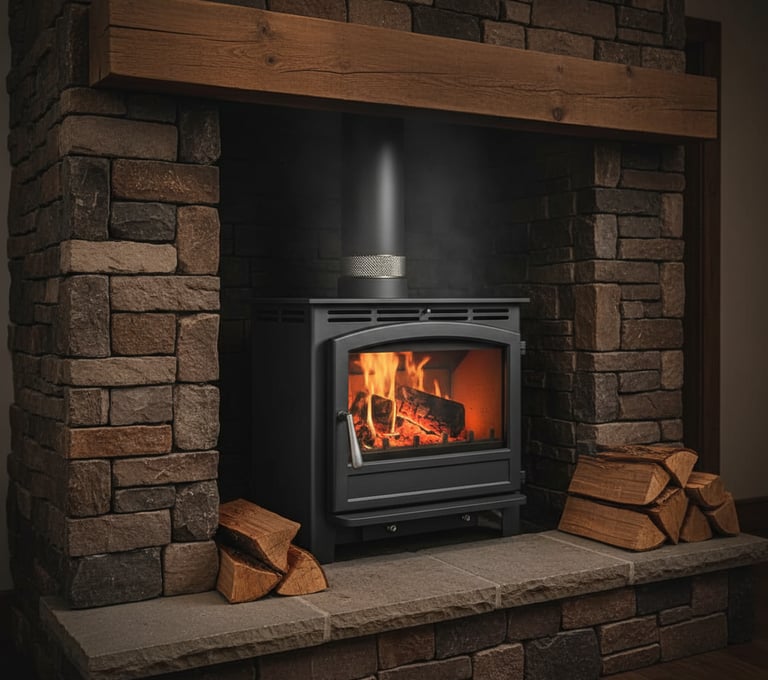
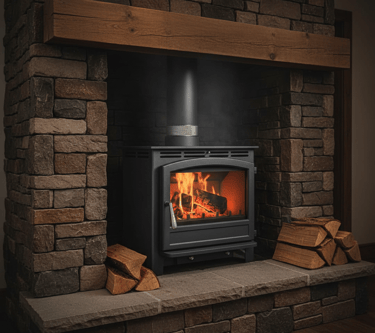
11. Boost Efficiency with a Wood-Burning Insert
This is less of a cosmetic fix and more of a major functional upgrade. Traditional open fireplaces are very inefficient, losing most of their heat up the chimney. A wood-burning insert is essentially a sealed, high-efficiency stove that fits directly into your existing firebox. It boosts heat output dramatically (from ~20% to over 75% efficiency) and reduces wood consumption.
Warning: This is not a DIY job. Installation requires a certified professional to ensure it's vented correctly and meets all local safety and building codes.
Difficulty: Professional Installation Required
Cost: $2,400 - $3,500 (installed)
Time: 1-2 days (for professional install)