Stop Plastering Over Perfection: 22 Red Brick Kitchen Ideas That Prove "Industrial" is the New Cozy
For years, we tried to hide exposed brick, but it is actually the ultimate texture tool. I break down 22 transformative ways to style a red brick kitchen, including the classic NYC loft aesthetic, how to use navy blue for a sophisticated look, and why plants are the perfect accessory for masonry.
LIVING ROOM
For decades, homeowners spent thousands of dollars covering up exposed brick with drywall, plaster, or layers of thick paint, aiming for a "clean" suburban look. We wanted smooth. We wanted perfect. We wanted predictable.
Today, we know better.
Red brick is the ultimate texture tool in interior design. It brings warmth, history, and an architectural grit that simple paint cannot replicate. Whether you are working with an authentic 19th-century exposed wall in a city loft or installing high-quality brick veneer in a new build, this material is a shapeshifter. It can feel distinctly industrial, charmingly rustic, or surprisingly modern—depending entirely on what you pair with it.
If you are lucky enough to have brick in your kitchen, do not hide it. Here are 22 transformative ways to style red brick to create a culinary space that feels curated, not chaotic.
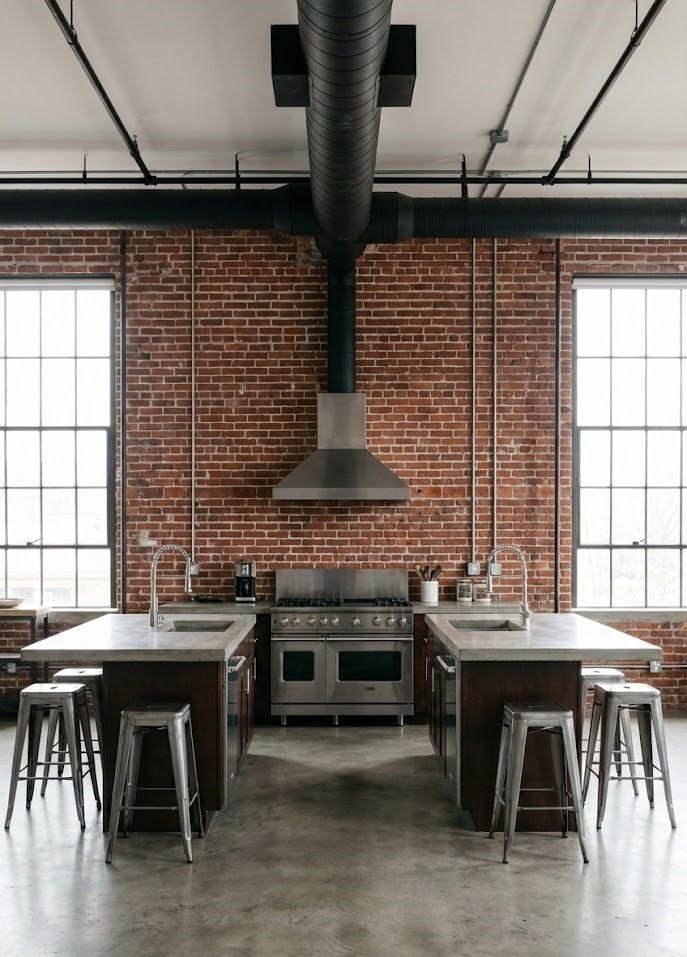
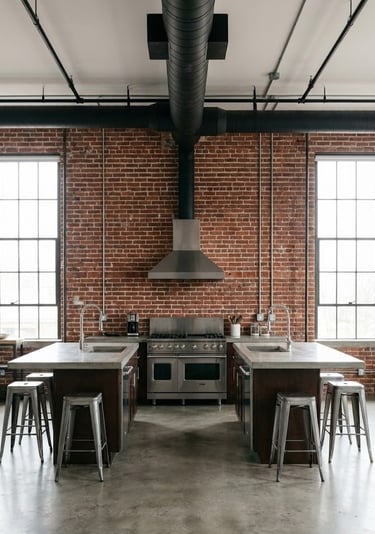
1. The Classic NYC Loft Aesthetic
Nothing screams "urban chic" quite like the combination of distressed red brick and exposed ductwork. This look leans into the raw nature of the material and celebrates the engineering behind the home. By leaving pipes, ventilation ducts, and even electrical conduit exposed (often painted matte black or galvanized silver), you create a vertical draw that makes ceilings feel higher.
Real-World Application: Pair raw brick with stainless steel appliances and poured concrete countertops to complete the industrial trifecta. Use track lighting clipped directly to the exposed beams to highlight the texture.
Pros: It maximizes vertical space and creates an authentic "artist studio" vibe that is highly sought after in real estate.
Cons: Exposed ductwork can collect dust and requires more frequent cleaning than enclosed ceilings. Sound also travels more freely without insulation and drywall.
Style Tip: If your existing pipes are ugly PVC, spray paint them with a metallic finish (copper or steel) to elevate them from "plumbing" to "decor."
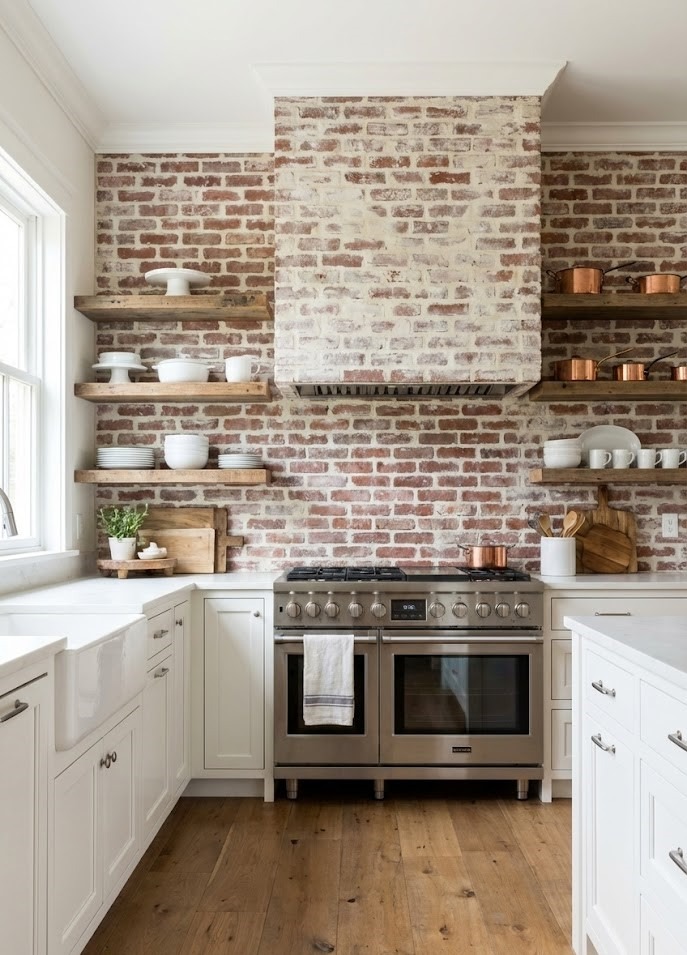
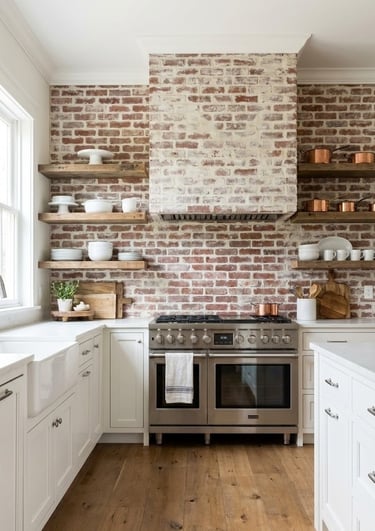
2. The "German Smear" Soften
If deep red feels too heavy or dark for your space, consider the German Smear technique. This involves spreading wet mortar over the brick and wiping some of it off before it dries. It mimics the look of old-world European cottages and softens the harsh red tones into a creamy, textured white-wash. Unlike paint, which sits on top, the mortar enters the pores, creating an irregular, organic finish.
Real-World Application: This is perfect for farmhouse kitchens that want texture without the darkness of traditional red clay. It pairs beautifully with butcher block counters and shaker cabinets.
Pros: It brightens the room significantly while retaining the brick texture. It’s also an affordable DIY project requiring only mortar, water, and a trowel.
Cons: This is a permanent application. Once the mortar cures, removing it is nearly impossible without sandblasting the brick.
Style Tip: Start with a "heavy" hand in corners and near the floor/ceiling, and a lighter hand in the center of the wall to create a naturally weathered appearance.
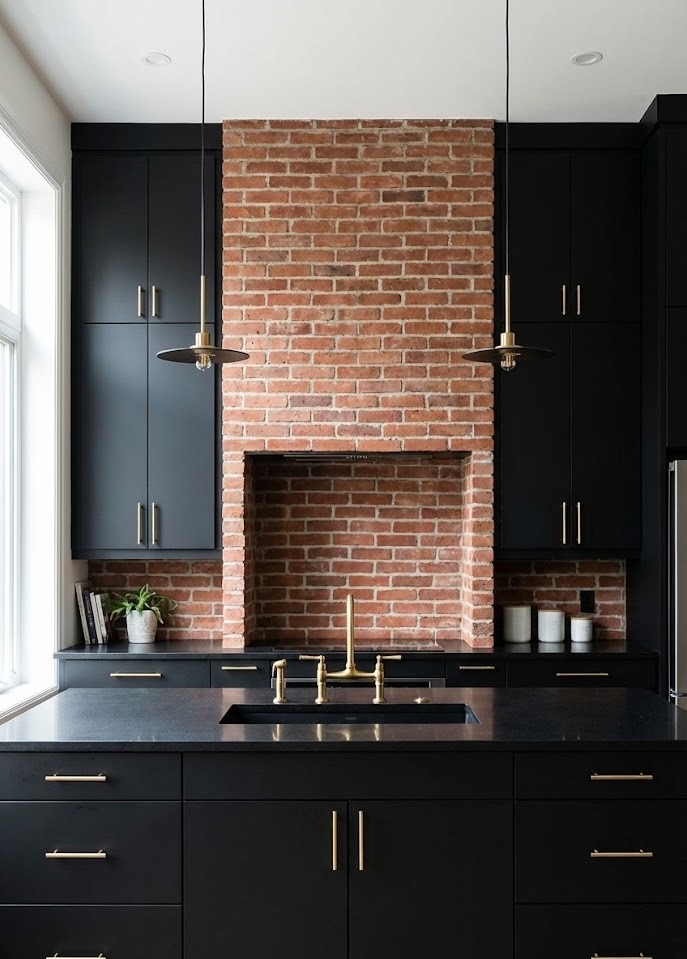

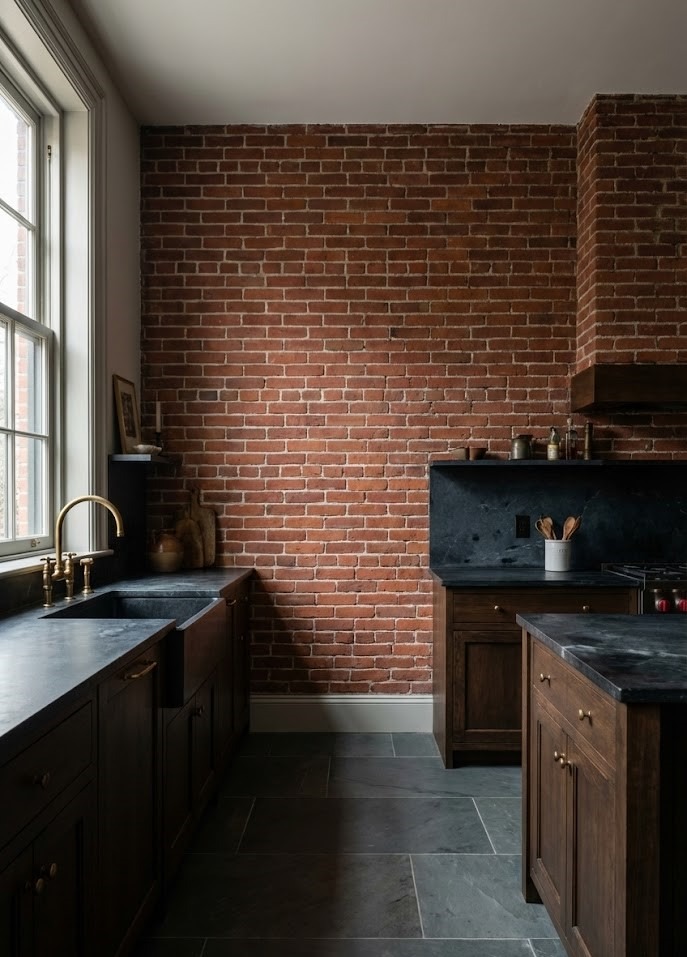
3. Matte Black Cabinetry Contrast
Red brick is naturally warm, boasting heavy orange, brown, and red undertones. The best way to modernize it is to pair it with something cool and void of light: matte black. The high contrast is visually arresting. The flatness of matte black cabinets allows the texture of the brick to be the star of the show without competing for attention.
Real-World Application: Opt for fingerprint-resistant laminate or painted wood cabinets in "Tricorn Black" or similar deep charcoal hues.
Pros: This creates a sleek, moody, and high-end look. It hides scuffs better than white cabinetry.
Cons: Matte black surfaces can show grease splatters and dust more easily than lighter colors. It can also make a small kitchen feel smaller if lighting isn't adequate.
Style Tip: Use brushed brass or gold hardware on the black cabinets. The gold tones will pick up the warm flecks in the brick, tying the two contrasting elements together.
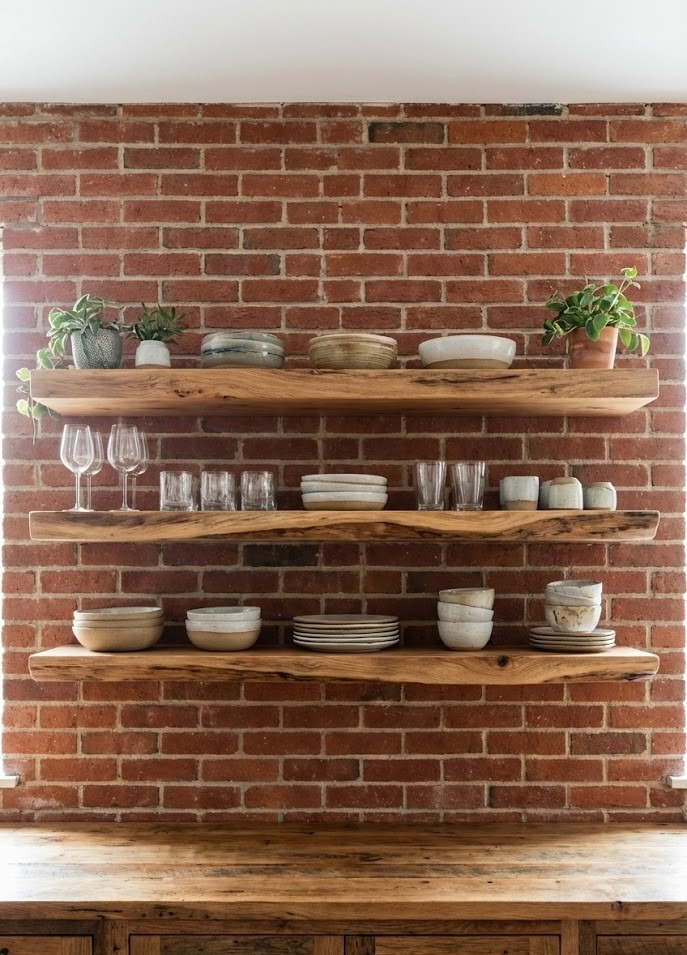
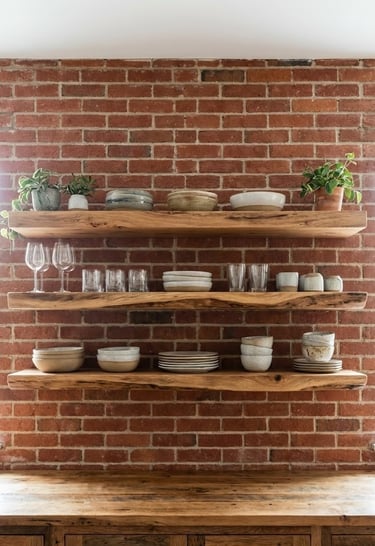
4. The Open-Shelving Gallery
Brick walls are beautiful, but they present a challenge: they are difficult to drill into and can look cluttered if covered by bulky upper cabinets. Mounting sturdy floating shelves made of reclaimed wood or metal creates a functional display. Open shelving keeps the brick visible while providing storage for your prettiest dishware, turning your kitchen storage into decor.
Real-World Application: Use live-edge walnut shelves to introduce an organic curve against the rigid rectangular lines of the brick.
Pros: It forces you to declutter and only keep attractive items. It makes the kitchen feel airier and larger.
Cons: Dishes left on open shelves will accumulate dust and grease, requiring more frequent washing.
Style Tip: When drilling into brick, always use a masonry bit and try to drill into the mortar joints, not the brick itself. It’s easier to patch mortar than a cracked brick if you change your mind later.


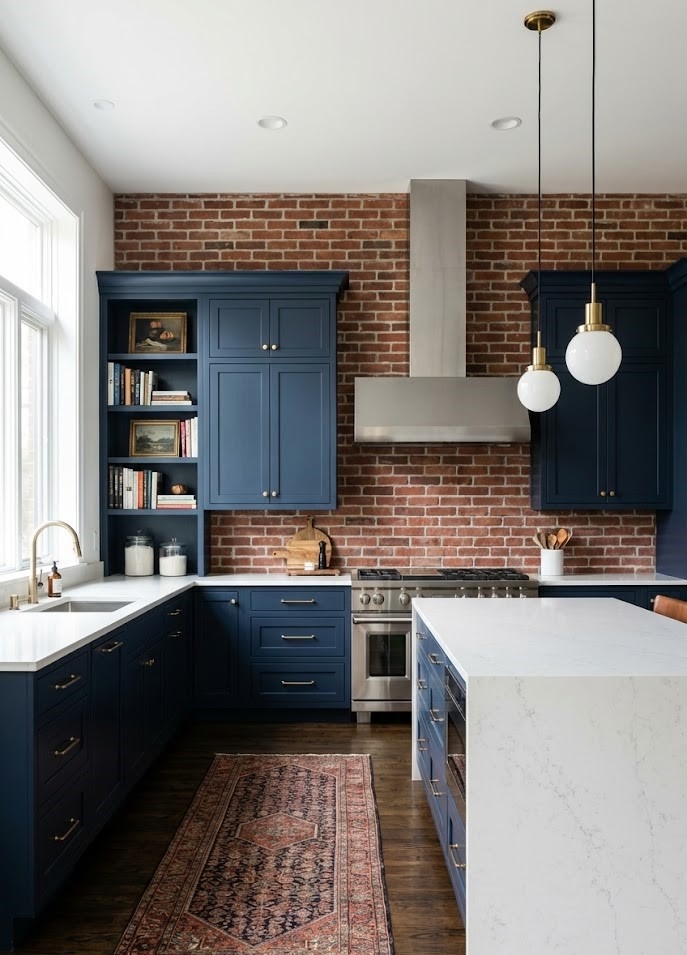
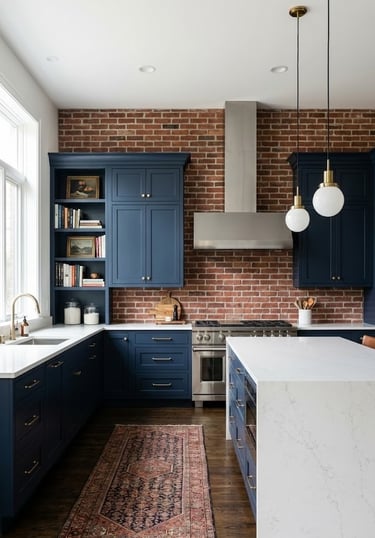
9. Navy Blue Sophistication
Deep Navy Blue cabinets paired with red brick create a rich, moody, and academic atmosphere. Blue cools down the orange tones of the brick, making the kitchen feel sophisticated rather than rustic. It’s a timeless color combination often found in historic brownstones and high-end renovations.
Real-World Application: Look for "Hale Navy" or "Midnight Blue" paint colors.
Pros: A classic color palette that rarely goes out of style. Blue hides dirt better than white.
Cons: Dark cabinets plus dark brick can make a kitchen feel cave-like if there isn't ample natural light.
Style Tip: Use a satin or semi-gloss finish on the blue cabinets to reflect a bit of light against the matte, light-absorbing brick.


10. The Brick Kitchen Island
Flip the script: keep your walls smooth and plaster-white, but clad the base of your kitchen island in brick. It anchors the room. The island becomes a heavy, substantial architectural feature that feels like it grew out of the floor, rather than a piece of furniture just placed there.
Real-World Application: Top a brick island with a thick slab of butcher block or concrete for a warm, tactile surface.
Pros: The brick base is incredibly durable and scuff-resistant—perfect for homes with kids who kick the island while sitting on stools.
Cons: The rough surface can snag delicate clothing (like tights) if people sit too close.
Style Tip: Ensure you install a recessed "toe kick" at the bottom of the brickwork so you can stand comfortably at the island without stubbing your toes against the stone.
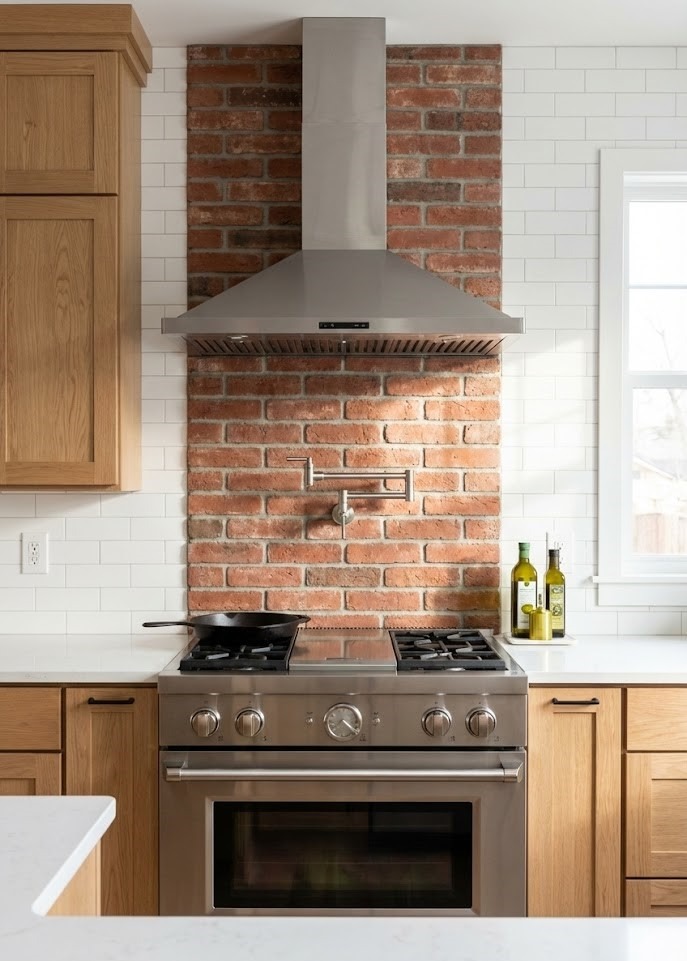
6. The Brick Backsplash Feature
If you don't have a full wall, install a brick veneer backsplash. This brings the texture into the "splash zone" behind the stove or sink. It acts as a stunning focal point. Unlike subway tile, which is glossy and uniform, brick adds a tactile, earthy element to the cooking area that feels grounded and robust.
Real-World Application: Use "thin brick" (slices of real brick) rather than faux panels for an authentic look.
Pros: Hides crumbs and minor splashes better than white tile. Adds instant character to a new build.
Cons: Brick is extremely porous. Without proper care, oil splatters and tomato sauce will stain it permanently.
Style Tip: Crucial Step: You must seal a brick backsplash with a high-quality matte masonry sealer. Re-apply the sealer every 1-2 years to ensure the surface remains non-porous and wipeable.
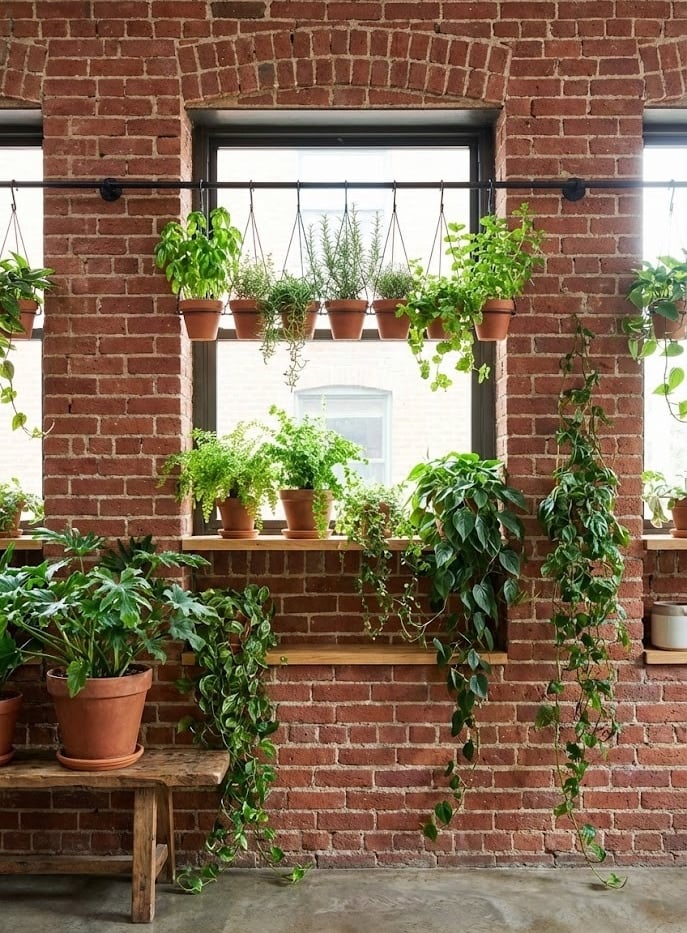
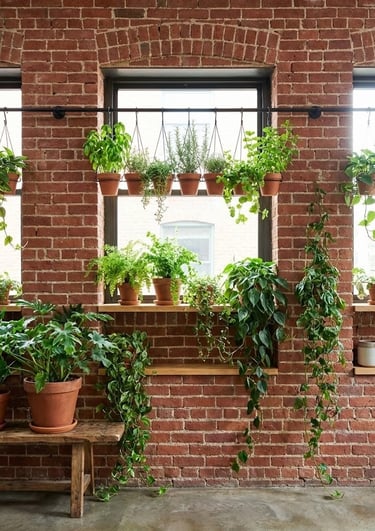
7. Biophilic Design (Plants on Brick)
Red and Green are complementary colors on the color wheel. Placing lush greenery against a red brick wall makes both colors pop vividly. It breathes life into the masonry. The organic, trailing shapes of Pothos, Ferns, or Ivy break up the rigid grid pattern of the mortar lines, creating a space that feels alive.
Real-World Application: Install a metal rod across a window set in a brick wall and hang pots of basil, rosemary, and thyme for a functional indoor garden.
Pros: Improves indoor air quality and mental well-being. Affordable decor that changes as it grows.
Cons: Plants require maintenance, water, and specific light conditions. Damp pots against brick can cause efflorescence (white salt deposits).
Style Tip: Use terracotta pots to match the brick, or stark white ceramic pots for high contrast. Ensure all pots have saucers to prevent water from staining the masonry.
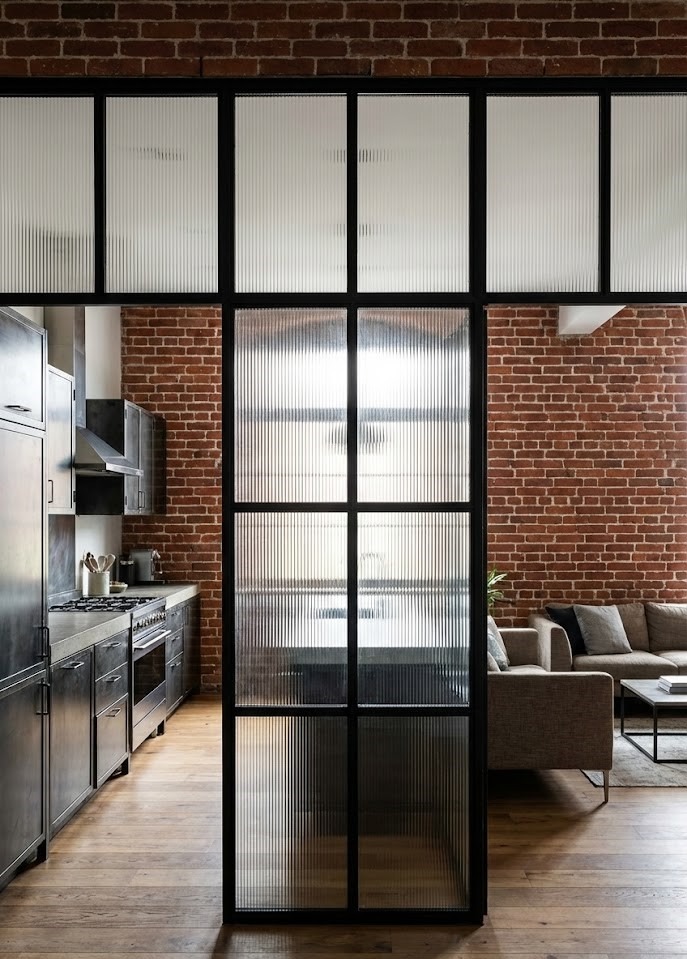
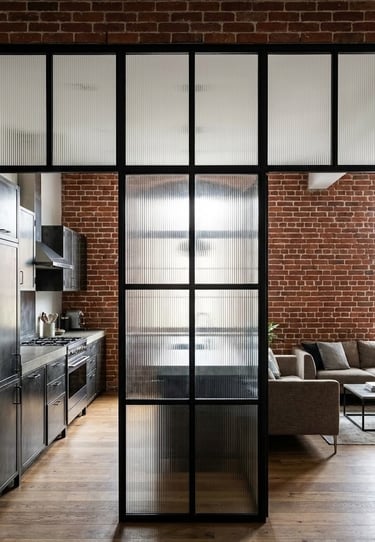
8. The Glass Partition Wall
Separate your kitchen from the living area without losing light by using steel-framed glass partitions set against the brick. It maintains the open-concept feel while creating sound separation. The black steel grid mimics the industrial vibe of the brick while adding a layer of transparency.
Real-World Application: Use this to separate a pantry or a wine room from the main kitchen.
Pros: Allows natural light to penetrate deep into the home. Keeps cooking smells contained without isolating the chef.
Cons: Custom steel and glass work is expensive. Glass requires frequent cleaning to remove fingerprints.
Style Tip: Use fluted or reeded glass if you want light to pass through but desire a bit of visual privacy to hide a messy kitchen counter from guests.
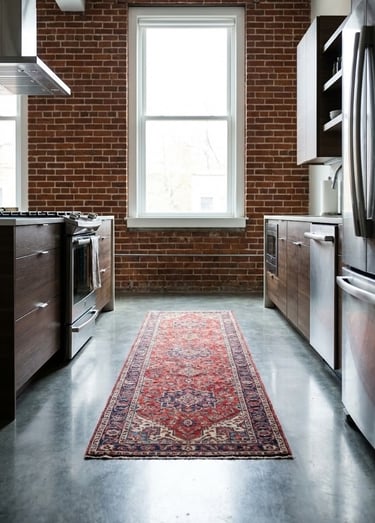
5. The Polished Concrete Floor Pairing
Ground your red brick walls with poured concrete flooring. The cool grey tone of concrete is the color wheel opposite of red brick, providing perfect visual balance. It’s durable, edgy, and the seamless nature of concrete prevents the room from feeling too busy, which can happen if you pair brick walls with tiled floors (pattern on pattern).
Real-World Application: A satin-finish sealed concrete floor creates a slight reflection, bouncing light around the room.
Pros: Incredibly durable, easy to clean, and hypoallergenic. It creates a seamless flow between rooms.
Cons: Concrete is very hard underfoot, which can be fatiguing during long cooking sessions. It is also cold unless you install radiant floor heating.
Style Tip: Add a vintage Persian runner rug in deep reds or blues to soften the acoustics, warm up the floor, and bridge the color gap between the grey floor and red wall.


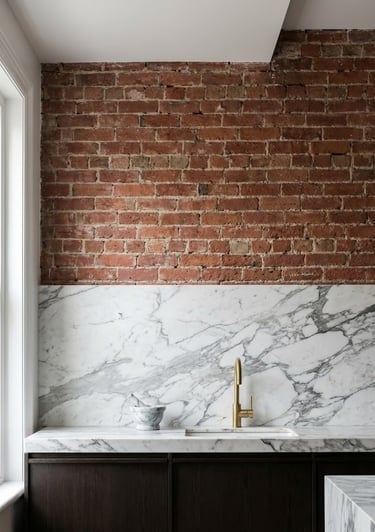
15. The Luxury Marble contrast
Mix high and low. Pair rough, "cheap" brick with expensive, high-vein marble or quartz countertops and backsplashes. The juxtaposition is luxurious. The smooth, cool touch of marble elevates the brick from "construction site" to "high-end design."
Real-World Application: Calacatta Gold or Carrara marble counters pairing with a rugged brick wall.
Pros: Adds a touch of elegance and brightness. Marble is naturally cool, which is great for baking/pastry.
Cons: Real marble is high maintenance (prone to etching from lemon juice/vinegar).
Style Tip: Install a "splash guard" of marble that runs 4-6 inches up the wall, ending where the exposed brick begins. This protects the brick at the joint while maintaining the aesthetic.
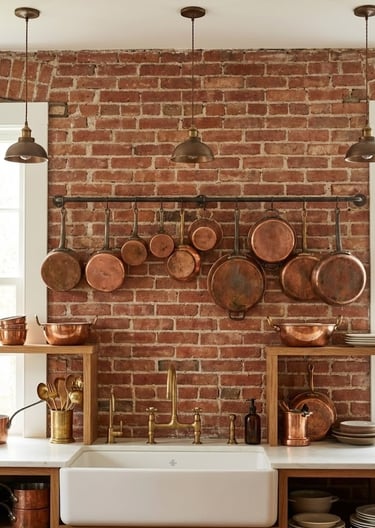
11. Copper and Brass Accents
Warm metals love red brick. Swap out chrome or nickel fixtures for unlacquered brass, copper pots, or bronze lighting. These metals share the same warm, earthy undertones as the clay. As the metals patina and darken over time, they look even better against the aged brick, creating a cohesive "old world" palette.
Real-World Application: A hammered copper farmhouse sink against a brick wall is a showstopper.
Pros: Adds warmth and luxury. Unlacquered metals are antimicrobial.
Cons: Real copper and brass require polishing if you want them to stay shiny (though the patina is part of the charm). They are generally more expensive than chrome.
Style Tip: Hang a rail of copper pots directly onto the brick wall for a French country kitchen vibe that doubles as storage.
12. The "Ghost" Brick (Painted White)
If you love the texture of brick but hate the color red, simply paint it bright white. You keep the shadow lines and the uneven texture, which adds character, but you gain the light-reflecting benefits of a white kitchen. This is ideal for Scandinavian or Coastal design styles.
Real-World Application: Use a high-quality masonry paint that allows the brick to breathe.
Pros: Instantly makes a small, dark kitchen feel massive and bright. Updates 1970s-style brick instantly.
Cons: It is impossible to reverse. Once you paint brick, it will always be painted brick.
Style Tip: Use a paint sprayer rather than a roller. Brick is porous and uneven; a roller will miss the mortar joints, leaving tiny dark specks. A sprayer ensures full, even coverage.
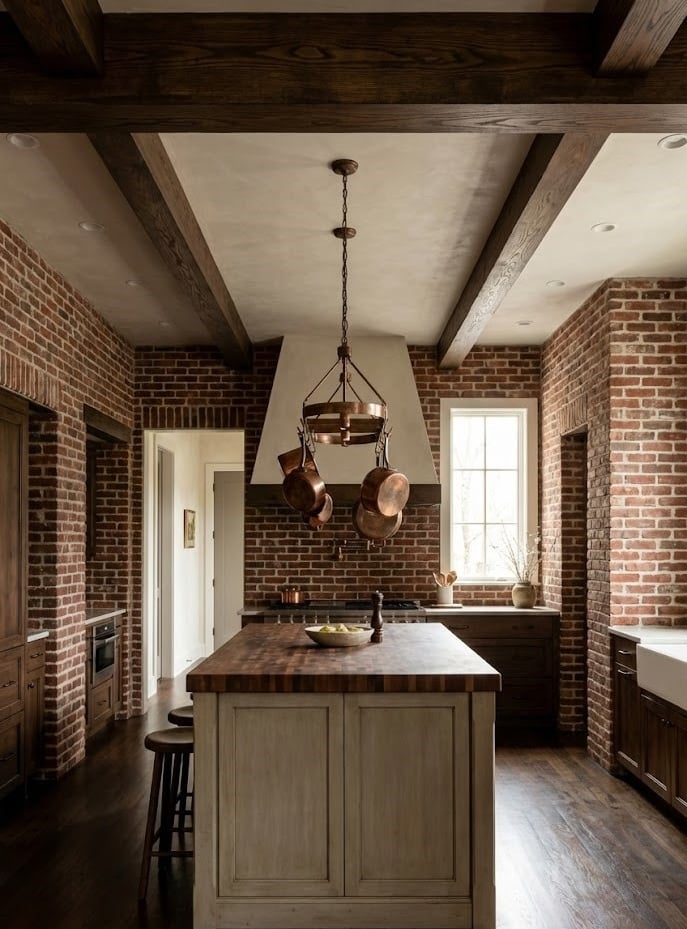
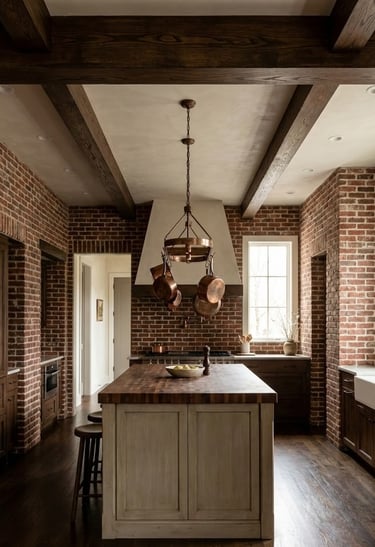
13. Rustic Beam Ceilings
Mirror the rustic nature of the walls on the ceiling. Exposed wooden beams (whether structural timber or lightweight faux box beams) draw the eye upward and balance the visual weight of the room. It creates a "sandwich" effect of texture (floor, walls, ceiling) that makes the kitchen feel like a cozy cocoon.
Real-World Application: Reclaimed barn wood beams are the gold standard here.
Pros: Adds immense architectural character. Hollow faux beams can be used to hide electrical wiring for pendant lights.
Cons: Dark ceilings can make a room feel lower. Real timber is heavy and expensive to install.
Style Tip: Stain the beams a dark walnut to match the darkest bricks in your wall mix, creating a cohesive color story.
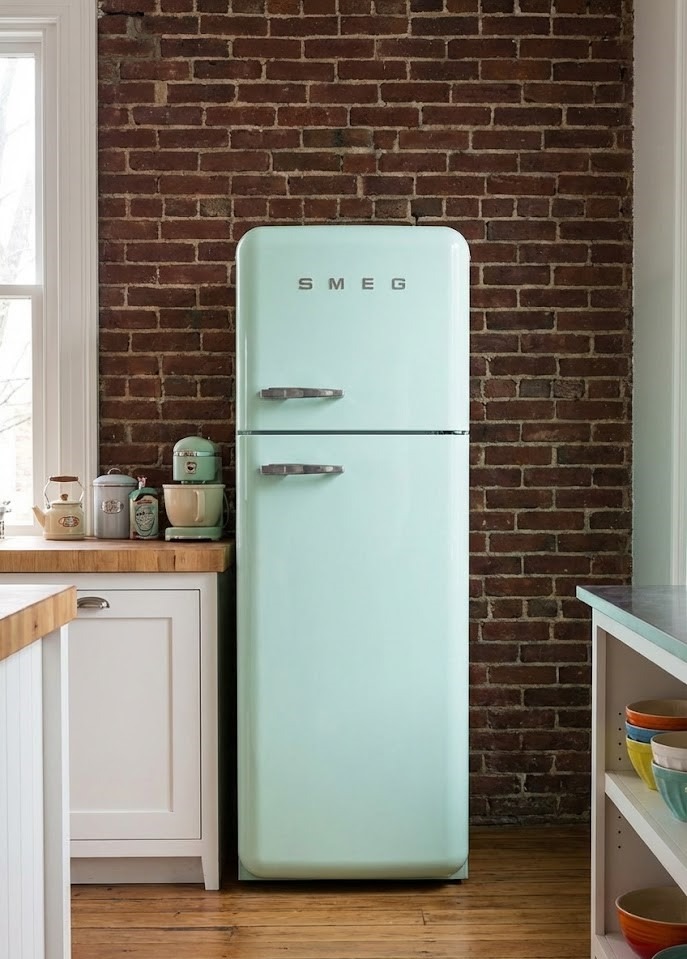
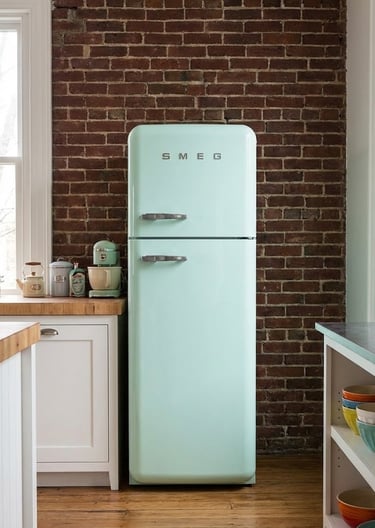
14. Retro "Smeg" Style
Red brick is the perfect backdrop for mid-century modern or retro appliances. Think rounded fridges in pastel colors or bright reds. The playful, smooth curves of retro appliances contrast beautifully with the rough, serious texture of the brick. It adds a sense of whimsy and prevents the "industrial" look from taking itself too seriously.
Real-World Application: A Smeg or Big Chill fridge in cream, mint green, or cherry red.
Pros: Creates an instant focal point and conversation starter.
Cons: Retro appliances often have smaller capacities and fewer high-tech features (like ice makers) compared to modern standard fridges.
Style Tip: A cream or mint green retro fridge looks stunning against a darker red brick wall, while a red fridge on a red wall might get lost—go for contrast.
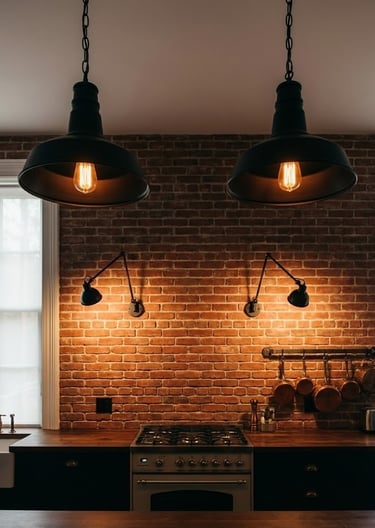
16. Moody Industrial Lighting
Lighting is key with brick because brick absorbs light rather than reflecting it. Use oversized factory-style pendants, cage lights, or barn sconces. It reinforces the industrial narrative. The warm glow of the bulbs highlights the texture and varying depth of the brick surface.
Real-World Application: matte black metal pendants with warm-temperature LED Edison bulbs (2700K).
Pros: Adds personality and reinforces the design theme.
Cons: Cage lights can cast shadows (spidering) which might be annoying for precision cooking tasks.
Style Tip: Install wall sconces with articulating arms to direct light onto specific work zones. This is practical for cooking and looks incredibly stylish against the masonry.
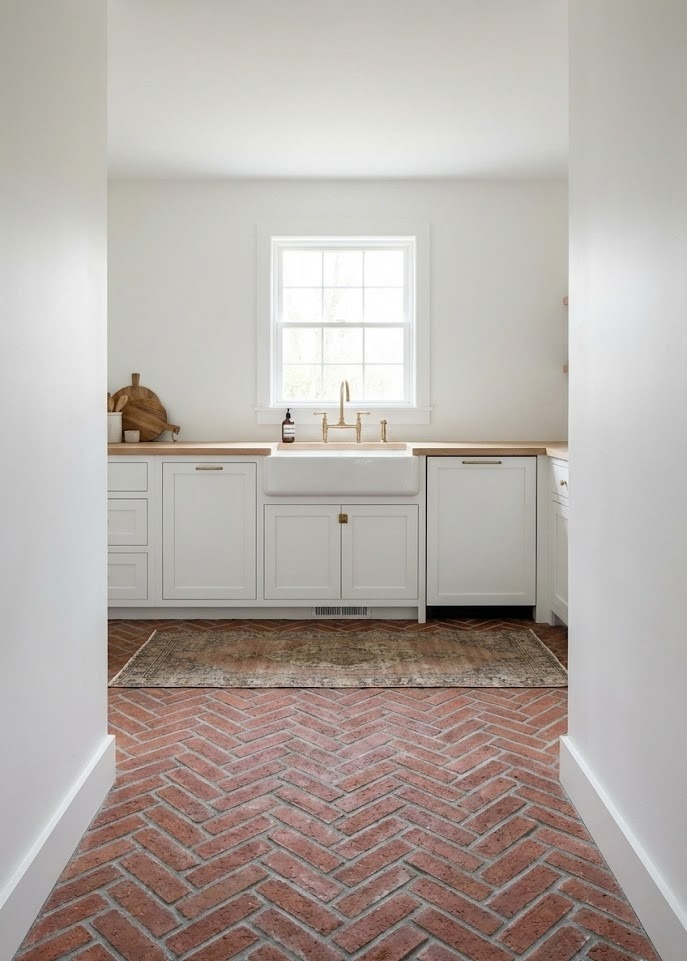
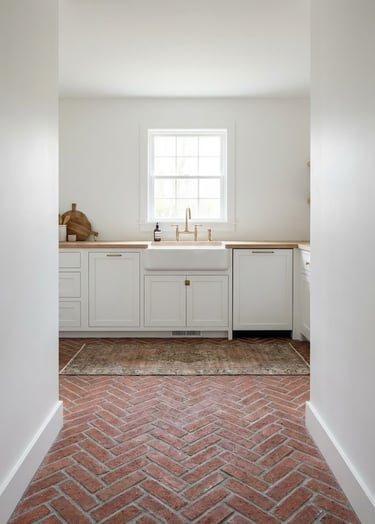
17. Herringbone Brick Floors
If your walls are drywall, bring the brick to the floor. A herringbone pattern brick floor is incredibly durable and hides dirt well. It feels like an old European courtyard or a rustic wine cellar. It’s ideal for mudrooms and kitchens that see high foot traffic and messy boots.
Real-World Application: Use dedicated brick pavers that are thinner than wall bricks to avoid raising the floor height too much.
Pros: Virtually indestructible. Hides pet hair and crumbs effortlessly.
Cons: The uneven surface can cause tables to wobble. It is hard to clean if not sealed properly.
Style Tip: Use a grey or charcoal grout rather than white. White grout on a floor will turn grey eventually anyway—embrace the darker grout from day one for lower maintenance.
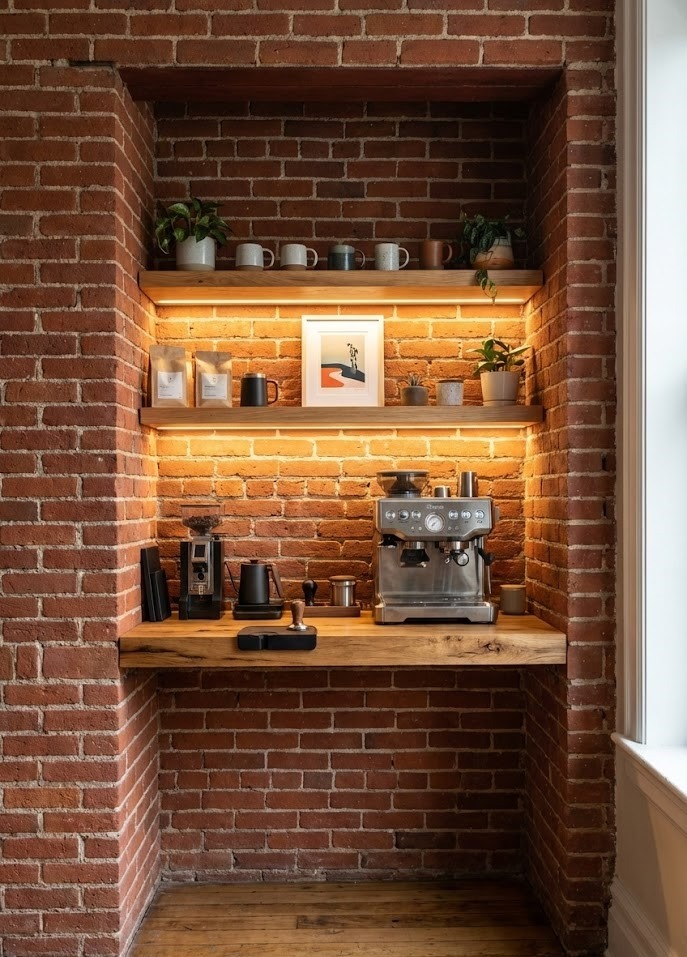
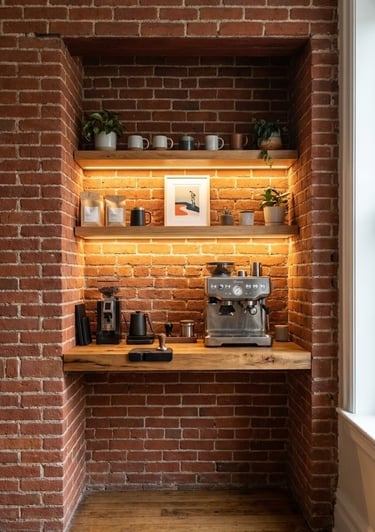
18. The Coffee Nook Alcove
Utilize a small recessed area or corner with exposed brick to create a dedicated coffee station. It creates a "destination" within the kitchen. The brick makes the small nook feel intimate, like a local coffee shop, separating the morning ritual from the chaos of the main cooking area.
Real-World Application: Floating shelves above a small counter, housing your espresso machine, grinder, and favorite mugs.
Pros: Keeps the coffee mess (grounds, water spills) contained in one area. Frees up main counter space.
Cons: Requires electrical outlets in that specific niche.
Style Tip: Add under-shelf LED strip lighting in the nook. In the early morning, the soft glow against the brick is welcoming and much better than turning on the harsh overhead lights.


19. Slate and Soapstone
For a darker, deeper palette, pair red brick with soapstone countertops and slate grey floors. Soapstone has a matte, velvety texture that complements brick better than shiny granite. It creates a historic, "lived-in" feel that suggests the kitchen has been there for a century.
Real-World Application: Natural soapstone counters that are oiled to a deep charcoal black.
Pros: Soapstone is non-porous (won't stain), heat resistant (put hot pans directly on it), and scratches can be sanded out.
Cons: It requires regular oiling to maintain the dark color; otherwise, it fades to a dusty grey. It is softer than granite and can chip.
Style Tip: Allow the soapstone to oil naturally; the darkening stone will pick up the darker "burnt" tones in the brick, creating a seamless integration.
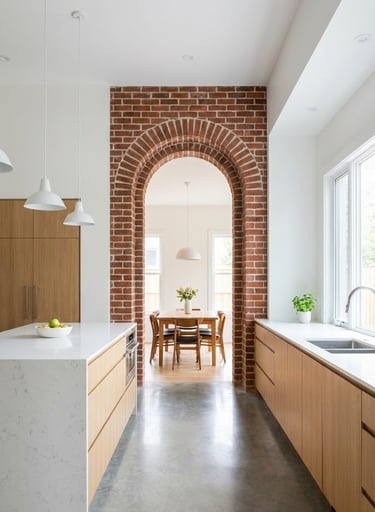
20. The Modern Archway
If you are renovating, consider creating an arched doorway or pass-through lined with brick. Arches are a major design trend that softens the boxy nature of most rooms. A brick arch becomes a stunning architectural frame between the kitchen and the dining room, turning a simple transition into a feature.
Real-World Application: A brick veneer arch separating the kitchen from a sunroom or breakfast nook.
Pros: High ROI on visual impact. Adds structural beauty.
Cons: Requires a skilled mason to execute correctly. It is labor-intensive and expensive compared to a standard square drywall opening.
Style Tip: If you cannot build a real brick arch, use thin brick veneer on the inside curve of a drywall arch to achieve the look for a fraction of the cost.
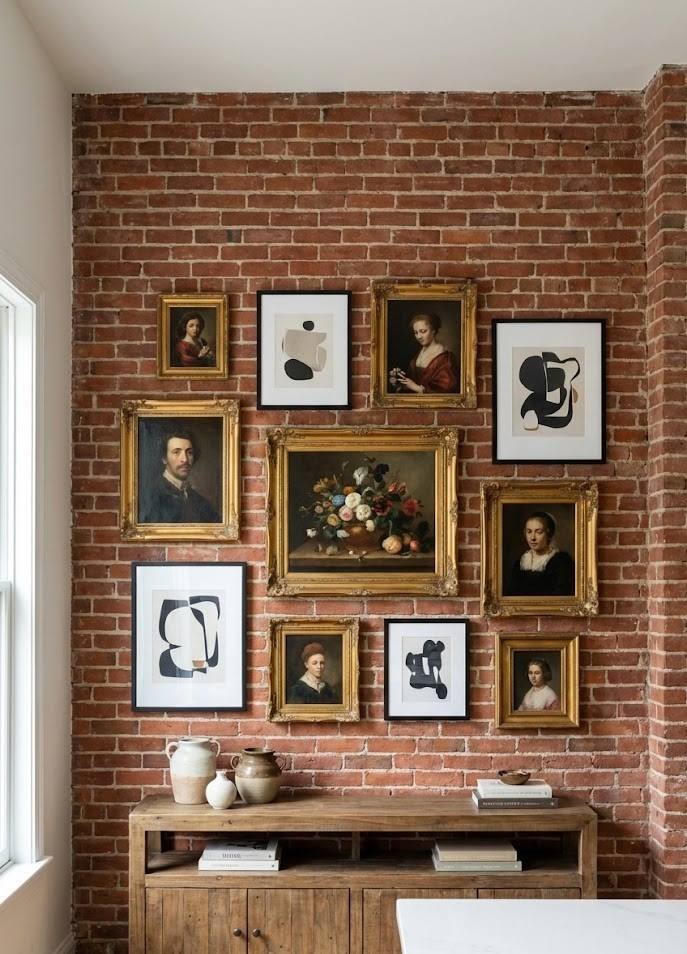
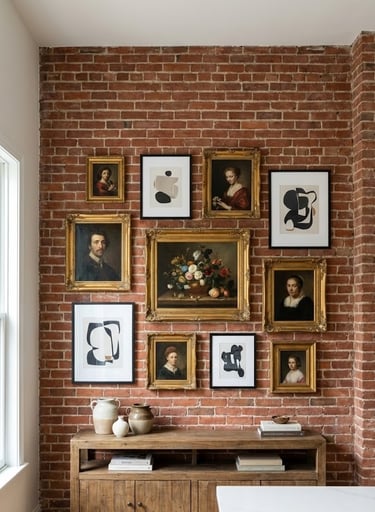
21. Curated Art Displays
Treat the brick wall like a gallery. Hang vintage oil paintings, botanical prints, or modern abstract art in ornate frames. The brick provides a busy, textured background, so bold, simple art or heavy frames stand out best. It creates a collected, bohemian, "un-kitcheny" look that feels very personalized.
Real-World Application: A vintage landscape painting in a gold frame hung above the stove (if not using the stove heavily) or near the breakfast table.
Pros: Adds color and personality. Makes the kitchen feel like a living room.
Cons: Kitchens have grease and steam. Do not hang valuable or unprotected art near the stove or dishwasher.
Style Tip: Use "brick clips" that grip onto the brick, or drill into the mortar joints. Avoid drilling into the face of the brick to prevent permanent damage to the stone.
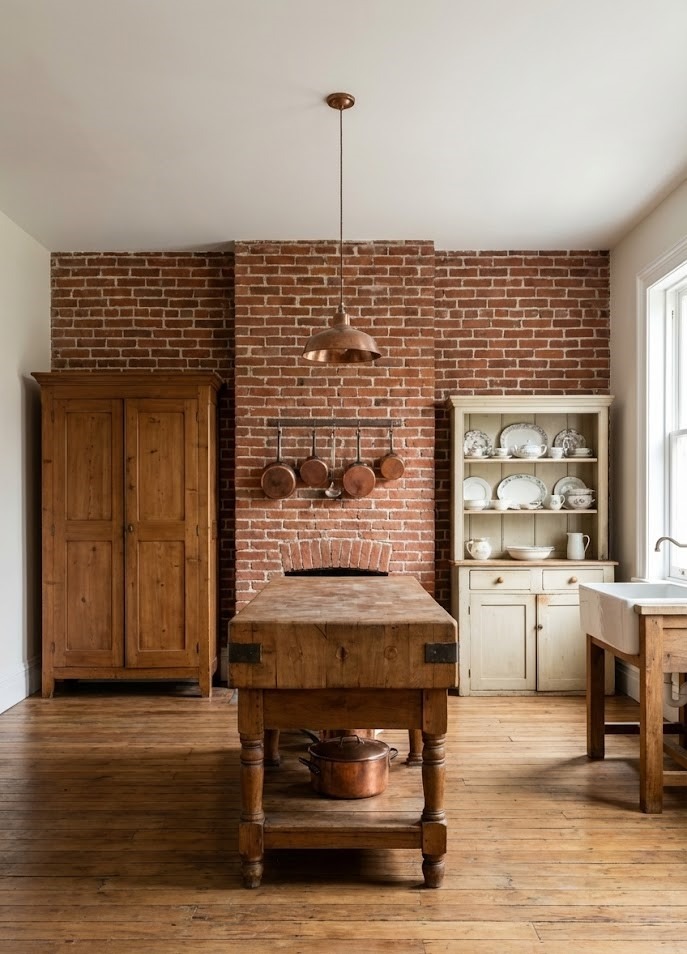
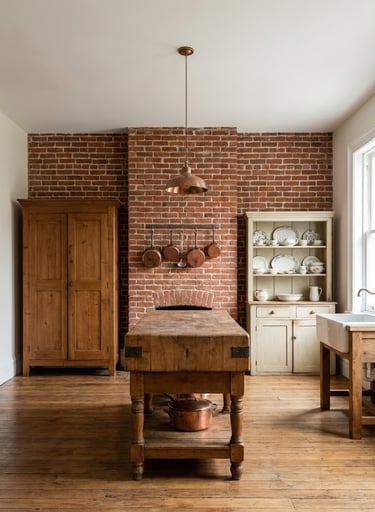
22. The "Unfitted" Kitchen
Move away from continuous built-in cabinetry and use freestanding furniture—a butcher block table, a standalone hutch, or a pantry armoire. This mimics the kitchens of the early 1900s. Brick walls feel most authentic when they aren't covered by wall-to-wall modern cabinetry boxes.
Real-World Application: A large antique pine table as an island, and a freestanding larder cupboard for dry goods.
Pros: Highly flexible; you can rearrange your kitchen layout whenever you want. You can take the furniture with you if you move.
Cons: Less space-efficient than fitted cabinetry. Cleaning underneath freestanding furniture is a chore.
Style Tip: Look for antique furniture pieces at estate sales that can be repurposed. An old dresser makes a fantastic coffee bar or cutlery station.
Conclusion: Embrace the Imperfection
Red brick in the kitchen is a bold design choice that pays off by adding immediate history and soul to your home. It creates a space that feels grounded and permanent in an era of fast furniture and disposable trends.
Whether you choose to paint it, whitewash it, or leave it in its raw, rugged glory, red brick provides a canvas that can handle industrial, farmhouse, and modern aesthetics with equal ease. It asks you to stop chasing the perfect, sterile showroom look and instead embrace texture, warmth, and character. So, put down the drywall and pick up the sealer—your dream kitchen is just a layer of texture away.